Warmzone Makes it Easy for Installers
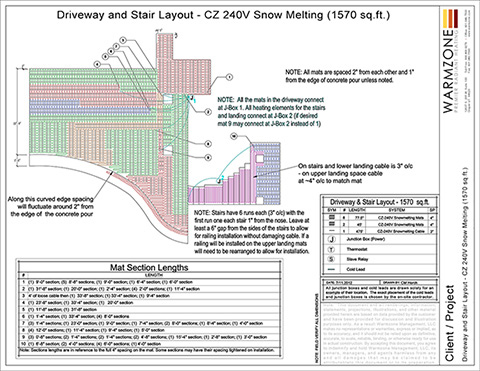
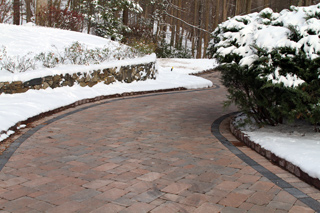
There are many options when it comes to installing a driveway heating system. While radiant heated driveways can be installed to keep entire driveways clear of snow and ice, the systems can also be easily customized to meet the specific needs and layout of the customer.
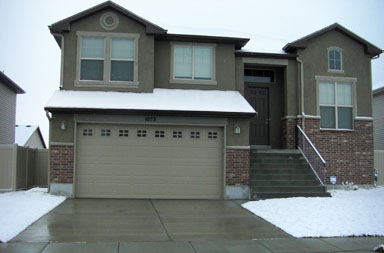
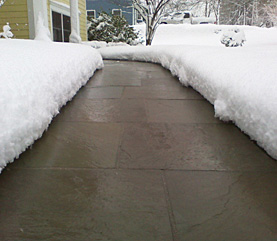
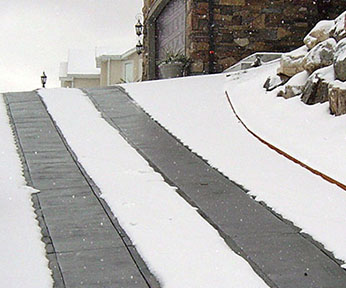
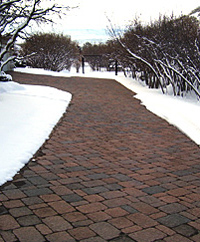
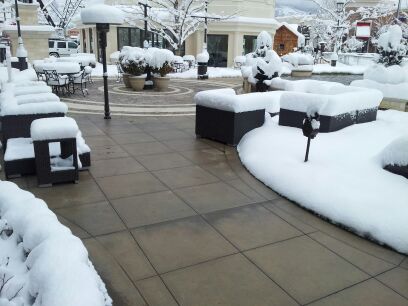
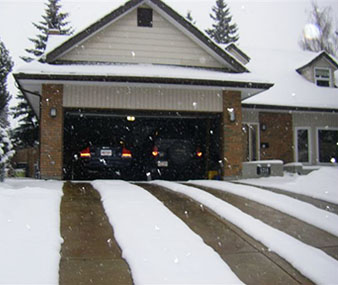
Electric heated driveway systems are fully automated and maintenance free, and simple to customize. Radiant heat can be installed in troublesome areas, such as inclines or shaded areas that are prone to ice buildup during the winter. Or, instead of heating an entire driveway, two 24-inch wide tire tracks can be installed. This not only can reduce the initial investment cost, but also minimize the power requirements and operating costs. Although heated driveways are a popular option for many homeowners and businesses, homes with inclined driveways that spill into a busy street make radiant heat a virtual necessity. Fortunately, the layout options of these versatile systems are unlimited, allowing customers to tailor their radiant heating systems to best accommodate the snow melting needs as well as their budget.
The layout options of these versatile systems are virtually unlimited, allowing customers to tailor their radiant heating systems to best accommodate the snow melting needs as well as their budget. Heated driveways can be a popular, convenient option for many homeowners and businesses, but homes with inclined driveways that spill onto a busy street make automated snow melting a virtual necessity.
Industry Leading Heated Driveway Components
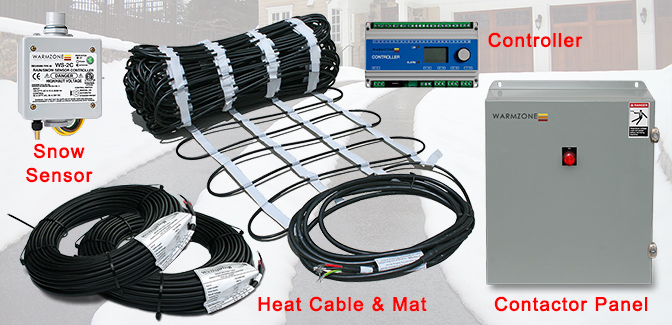
Warmzone automated snow melting systems feature the industry’s most trusted and proven components. The fully automated systems include ClearZone heat cable, snow sensor (activation device), contactor panel (available with or without GFEP), and marker plate (as required by the NEC).
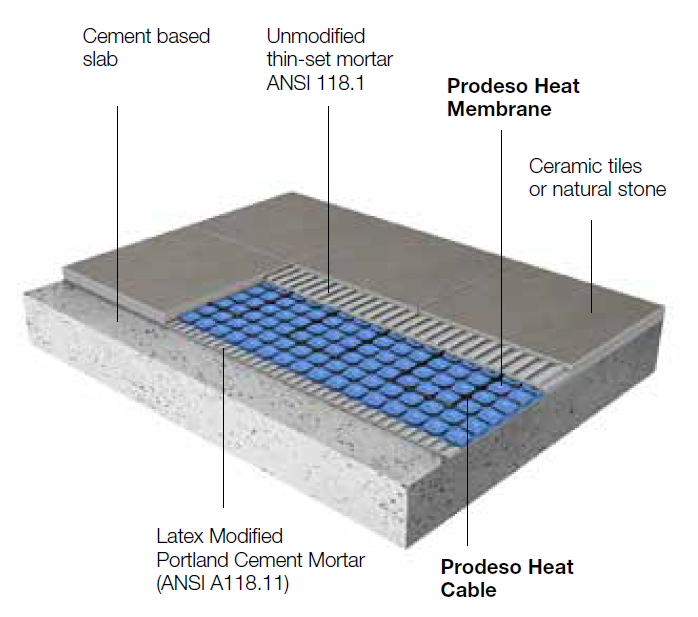
ClearZone Heat Cable
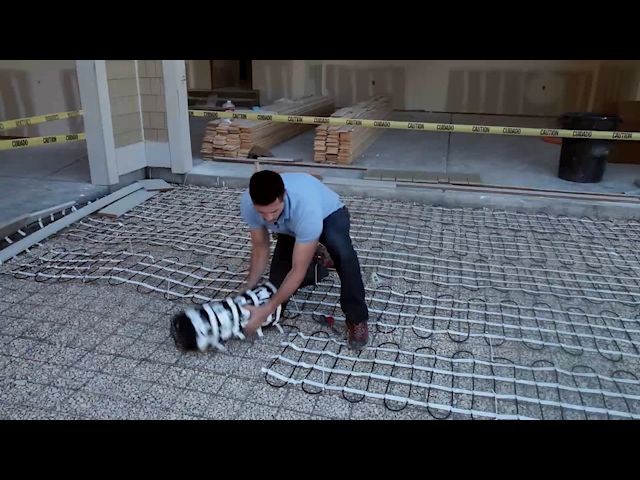
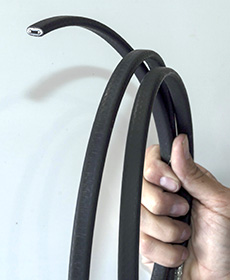
Warmzone’s snow melting heat cable is a proven industry leader that is being used in a variety of radiant snow melting systems throughout Northern America. The ClearZone heating cable features superior workmanship and materials, and is UL listed. The twin-conductor, single-point connection heat cable is designed with FEP/XLPE insulation and polyolefin jacketing (for flexibility and UV protection), allowing the radiant heating system to consistently provide top performance during extreme winter conditions.
Coupled with Warmzone’s proven industry-leading customer support services and 10-year manufacturer warranty, the ClearZone snow melting system is designed and built to outperform all competing products. While ClearZone cable is rated at 220°F, a special version of ClearZone cable is also available for hot asphalt installations. The maximum external jacket temperature for asphalt applications is rated at 460°F (240°C) for up to 10 minutes.
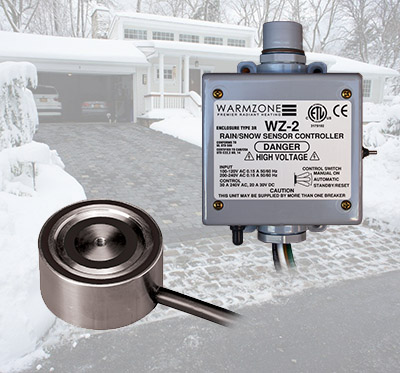
Snow Sensor (Activation Device)
Warmzone carries the premier aerial-mount and in-ground snow sensors. The advanced aerial-mount snow sensor is capable of sensing temperature and precipitation. When precipitation is detected and the temperature is below the ‘trigger point’ (normally set at 39°F), the unit signals the snow melting system controller (contactor panel). Power is then sent to the heating cable embedded in the driveway, warming the surface and preventing any snow buildup.

Smart system compatible, the aerial snow sensor also features adjustable delay off cycle, and upgradeable remote activation, as well as the adjustable temperature set point.
The in-ground snow sensor is also optional for Warmzone snow melting systems. This activation device is more commonly used in large commercial snow melting applications, but can be used in residential systems if desired. The pavement-mounted sensor requires the small control unit rather than the contactor panel. The control unit is a small, NEMA 1, wall-mounted control panel, approximately 6×3.5 inches wide and about 3.5-inches tall. The unit can be controlled from an external signal (day/week timer, GSM-module or other signal source) and can be switched on/off (standby). The controller features a 4-hour timer that serves as a manual backup to melt snow drifts or ice that may have formed on the driveway due to wind or shade.
Contactor Panel
To save installers time and money, Warmzone offers contactor panels with and without built in ground fault equipment protection (GFEP).
With GFEP: The ground fault equipment protection helps to minimize the risk of faults and eliminate extra wiring installation steps and costs. The panel is activated by a Warmzone activation device (either an in-ground or aerial-mount sensor).
Without GFEP: The Warmzone contactor panels are designed for snow and ice melting applications. All panels are pre-wired and UL listed complete with a NEMA 4 enclosure, wiring diagram, terminal connection block, and two or four 3-pole contactors. Timer panels can be used stand alone or in conjunction with an automatic controller. Contactor panels must be used in conjunction with an automatic controller.
In addition to Warmzone’s industry leading system components, Warmzone provides unparalleled customer services, including free installation training, technical support, and system design and layout services. A vast online library of installation videos and product documentation is also available on Warmzone’s website. Contact Warmzone today for more information or to receive a free quote. Call 888.488.9276 today.