
Contact Warmzone today.

Contact Warmzone today.

Contact Warmzone today.

Contact Warmzone today.

Contact Warmzone today.

Contact Warmzone today.

Contact Warmzone today.
Download the Warmzone LED WiFi Thermostat User Manual (PDF)
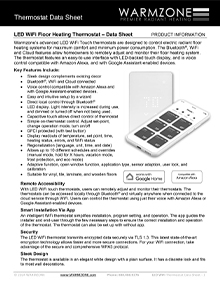
Download the Warmzone LED WiFi Thermostat Data Sheet (PDF)
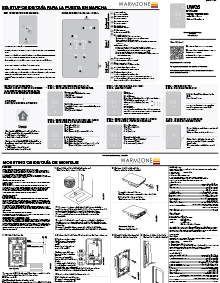
Download the Warmzone LED WiFi Thermostat Startup Guide (PDF)

Contact Warmzone today.